Part 1: Create A PCUnlocker Live CD/USB
- Click here to download and save the PCUnlocker self-extracting Zip file to any computer that you have access to, then extract the ISO image file (pcunlocker.iso) from it.
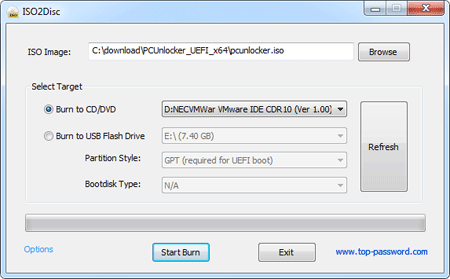
- Download and install the ISO2Disc utility, launch the program.
- Click the Browse button to locate the PCUnlocker ISO image file, then click the Start Burn button to make a PCUnlocker Live CD or USB drive.

- Insert your burned CD (or USB drive) into the physical computer that your VHD file is stored on.
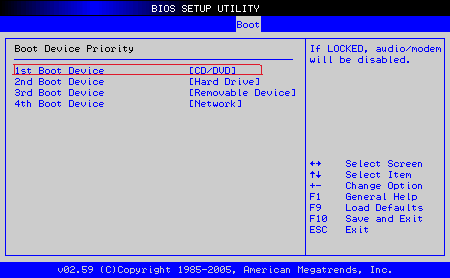
- Turn on the computer and check the boot-screen for setup key (i.e. DELETE key, F8 key, F2 key) to enter BIOS Setup Utility.
- Use the arrow keys to select the BOOT tab, then change the Boot Device Priority:
Set 1st Boot Device to CDROM if you've created a Live CD, or set 1st
Boot Device to Removable Device if a USB drive was created.

- Press F10 to save your changes. Now your computer should boot from PCUnlocker Live CD/USB.
- If everything goes as expected, the computer will load the WinPE OS from the Live CD/USB drive, and eventually take you to the PCUnlocker program.
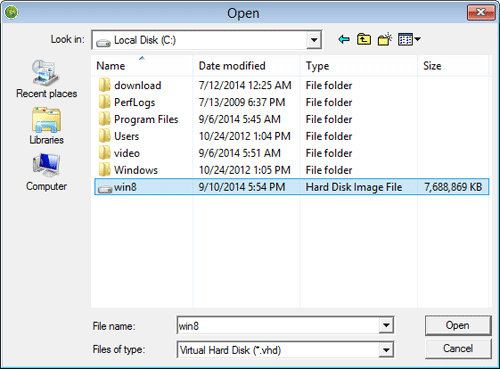
- Click on the Options button, and then select Mount Virtual Drive from the drop-down menu. When the file open dialog appears, locate your VHD file and click Open.

- After mounting the VHD file, click on the Browse
button to choose the SAM registry file for the Windows system installed
on your virtual drive. The program will list all your Windows accounts.

- Choose the administrator account and click on Reset Password button. It will unlock / remove your forgotten password immediately.
- Click Restart and remove the CD or USB drive, your computer will dismount the virtual hard disk and restart. Now you've successfully reset lost Windows Azure VM password!
No comments:
Post a Comment