Showing posts with label Windows 7. Show all posts

Wednesday, February 29, 2012

Install Mac OS X Snow Leopard on a PC using VMware

The following step by step guide will help you in installing Mac OS X 10.6 Snow Leopard as a guest virtual machine in Windows 7. You'll need to have a system with an Intel processor which supports hardware virtualization, original OS X Snow Leopard retail disk, VMware Workstation 7 and Windows 7, Vista or XP installed as host operating system. If you meet all these requirements, you can then install OS X Snow Leopard in VMware under Windows and can enjoy the best of both worlds.


Note: We don't in anyway encourage downloading Apple software via file-sharing / torrent sites and run it in an virtualized environment under Windows. This guide is for informational purposes only. If you like OS X Snow Leopard, Get a Mac.

Step 1: Download and install VMware Workstation 7.

Step 2: Click here to download pre-made modified version of Snow Leopard.vmdk and darwin_snow.iso files required to get this thing to work.

Step 3: Start VMware Workstation and open up "Mac OS X Server 10.6 (experimental).vmx" file which you downloaded in Step 2.
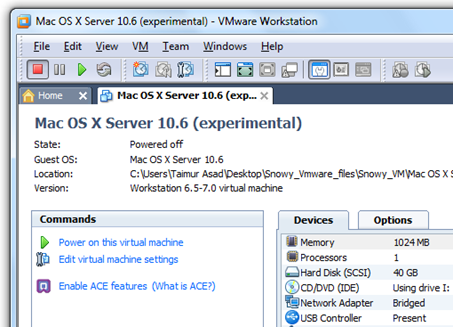
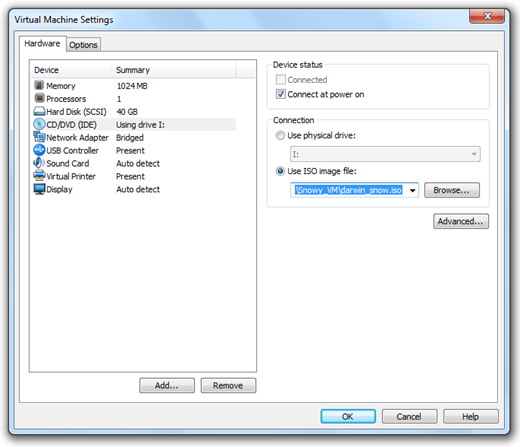
Step 4: Click on "Edit virtual machine settings", select CD/DVD (IDE) option from left hand side and then and select "Use ISO image file" option. Point it to "darwin_snow.iso" which you downloaded in Step 2.
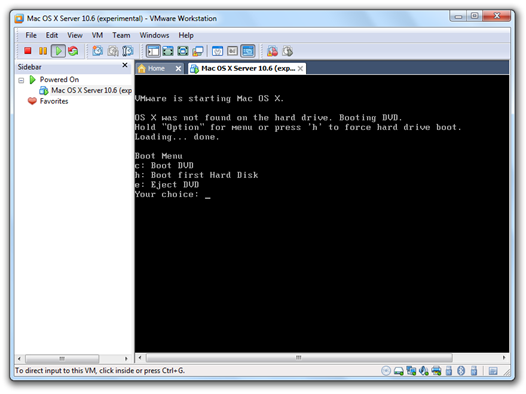
Step 5: Now power on the virtual machine and hit "F8" key. You should now have a screen similar to the one shown below.
Step 6: Now you’ll have to point your virtual machine to OS X Snow Leopard retail DVD instead of “darwin_snow.iso”. To do this, right click on CD/DVD option found in lower right most corner of your VMware window and select settings.
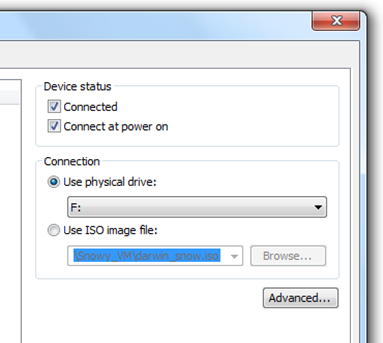
Insert OS X Snow Leopard retail DVD in your DVD drive and select the "Use physical drive" option.

Step 7: Now go back and select "c" option (Boot DVD) from the prompt which you got in Step 5 to boot from the OS X retail DVD. OS X boot screen with Apple logo should now appear. If the boot screen doesn't appear for you, try booting it in verbose mode by pressing "F8" key after selecting "c" option, and then enter "-v" (without quotes). This will enable the system to boot OS X DVD using verbose mode.
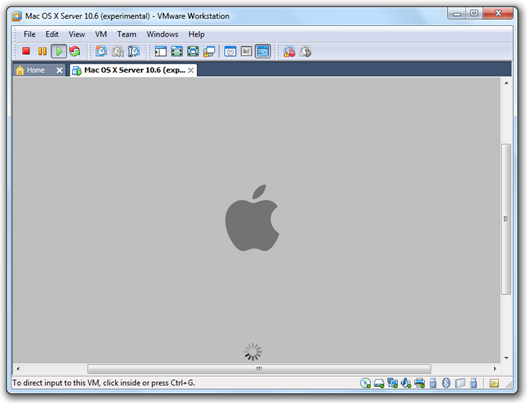
Step 8: Wait for a couple of minutes for the Installation Setup screen to show up. From here on, simply follow the onscreen setup instructions to install OS X Snow Leopard. Make sure you format your virtual hard drive in "Mac OS Extended (Journaled)" format using Disk Utility. Customize your installation with minimum set of printer drivers and language options for a lightweight trouble free installation experience.

Step 9: Once the installation is completed. System will automatically reboot. At this point, close your guest virtual machine and change your CD/DVD option again like you did in Step 2 to point it to "darwin_snow.iso".

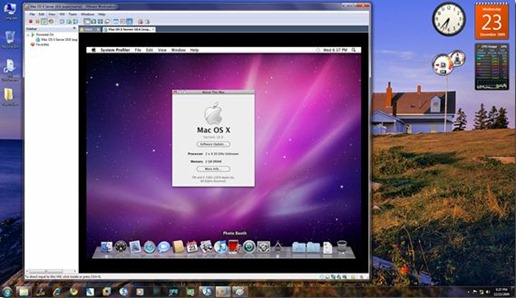
Step 10: Start the virtual machine again. Press "F8" key and select "h" option to "Boot first hard disk". Voila! Snow Leopard should now be running live under Windows 7!

Wednesday, January 11, 2012

Restrict Logon Hours for Any Windows Account

One of my friends complained that his child spends too much time on his computer. He was very worried for his kid's health. He tried to talk with the child but you know how stubborn they are. It was almost impossible to convince a six-year-old kid that spending too many hours in front of the computer can have a bad influence upon his health condition. I am a person who sustains children should learn how to use computers but I am against excessive use.

Regarding my friend's problem, I advised him to try software applications that restrict access to computer for a defined time interval. He was reticent about this idea asking me if there was a costless solution. He didn't want to use software trying to avoid his child getting suspicious. He just wanted a trick to restrict access in Windows without additional software and at no cost.
I immediately thought that the net user command would be perfect for this issue.  Follow the steps outlined below to easily limit the user's logon hours:

  1. Go to Start  menu.

  2. Go to Run and Type cmd, press Enter to open a Command Prompt window.

  3. Enter the appropriate net user command for the user(s) you wish to restrict access for.


Example 1:
Limits the user john to logon Monday- Friday between 8am and 5pm:
net user john /time:M-F,08:00-17:00

Example 2:
The same thing can also be expressed as above using the 12 hour clock :
net user john /time:M-F,8am-5pm

Example 3:
This shows the easiest way of setting limits that differ on multiple days.
net user john /time:M,8am-5pm;T,1pm-3pm;W-F,8:00-17:00

Example 4:
To remove time restrictions:
net user john /time:all

Windows accounts can be restricted from logging on to the computer at specific hours or days. You can only restrict when a user can log on to the system, but you cannot force a user to log off when their hours expire.

The next time when you try to log onto the same account, the operating system will check the time restrictions you set to determine if you are allowed to log into the  account. For restricted time periods, the system will required you to enter your password, even if you haven't set any password on that account. Furthermore, it will always reject you regardless if you enter a valid or invalid password.